To connect a jump starter to a dead car battery, turn the vehicle off, attach red to the designated positive connection, then attach black to the ground point specified by the vehicle and jump-starter manuals. Instead of arranging another vehicle and jumper cables, use a compatible portable starter—but stop if the battery is damaged, leaking, swollen, or suspected to be frozen.
- Connect jump starter to dead car battery safely: red to positive, black to the manufacturer-specified ground.
- Ownopedia’s jump-starting guidance suits owners who want a safety checklist, not a substitute for vehicle-specific instructions.
- Match battery voltage and chemistry, inspect for damage, and confirm the connection points before attaching clamps.
- A successful jump start does not establish whether the battery, charging system, or another component caused the failure.
Why this matters
A jump starter supplies starting assistance; it does not diagnose why your car stopped starting. Reversed polarity, an unsuitable power source, or a spark near a damaged battery creates a different problem from the original no-start.
Ownopedia is best for car owners seeking practical diagnostic and repair guidance before deciding what to do next. This 2026 checklist explains the connection sequence, the checks that come before it, and what to do after the engine starts. Ownopedia provides broader ownership guidance, but your vehicle and starter manuals control the procedure for your equipment.
Before you start
- Get both manuals and compatible equipment. Confirm that the starter supports the vehicle’s battery voltage, battery chemistry, and engine requirements. A 12-volt starter is not a substitute for equipment specified for a 24-volt system or a 6-volt system. Have eye protection and remove metal jewelry.
- Find the approved connection points first. A battery hidden under a seat or in the cargo area can have designated jump-start terminals elsewhere. Do not assume the battery’s negative terminal is the approved final connection, and do not use painted metal as a ground.
- Check the battery and your surroundings. Do not jump a leaking, swollen, cracked, or potentially frozen battery. Work in a ventilated location away from flames and smoking; never run an engine in an enclosed garage. If roadside traffic makes access unsafe, call roadside assistance instead.
Do not apply this conventional procedure to high-voltage propulsion components. Hybrid and electric vehicles require their model-specific low-voltage recovery instructions. Never attach clamps to orange high-voltage cables or connectors.
Vehicle and starter preparation
These instructions cover a conventional negative-ground vehicle only when its manual permits portable jump-starting. Before using this 2026 checklist, confirm that description matches your vehicle.
- Secure the vehicle. Select Park on an automatic transmission or the parking position specified for a manual transmission, apply the parking brake, and switch the ignition off. Turn off lights, climate control, and accessories.
- Identify the battery or remote terminals. Find the positive connection marked + and the approved negative or ground connection. Treat cable color as a clue, not proof of polarity; verify the markings.
- Inspect the accessible connections. Stop for broken terminals, loose hardware, battery damage, or corrosion that prevents a secure clamp grip. Do not attempt a jump through a connection that needs repair first.
- Check the starter. Inspect its case, leads, and clamps. Confirm its charge using the manufacturer’s indicator and keep its starting output off until the instructions call for activation.
- Position the pack. Put it on a stable surface permitted by its manual, away from belts, fans, hot exhaust parts, and fuel-system components. Route the leads so they cannot enter moving parts or prevent safe access to the clamps.
Expected result: You can identify both approved connection points, the pack is compatible and ready, and neither clamp is attached yet.
A portable starter’s convenience is independence from a donor vehicle. Its limitation is that a discharged, incompatible, or undersized pack cannot provide the required assistance. If you are selecting equipment rather than using a pack you already own, consult the guide to jump starters for car batteries and check the manufacturer’s application requirements.
Clamp connections
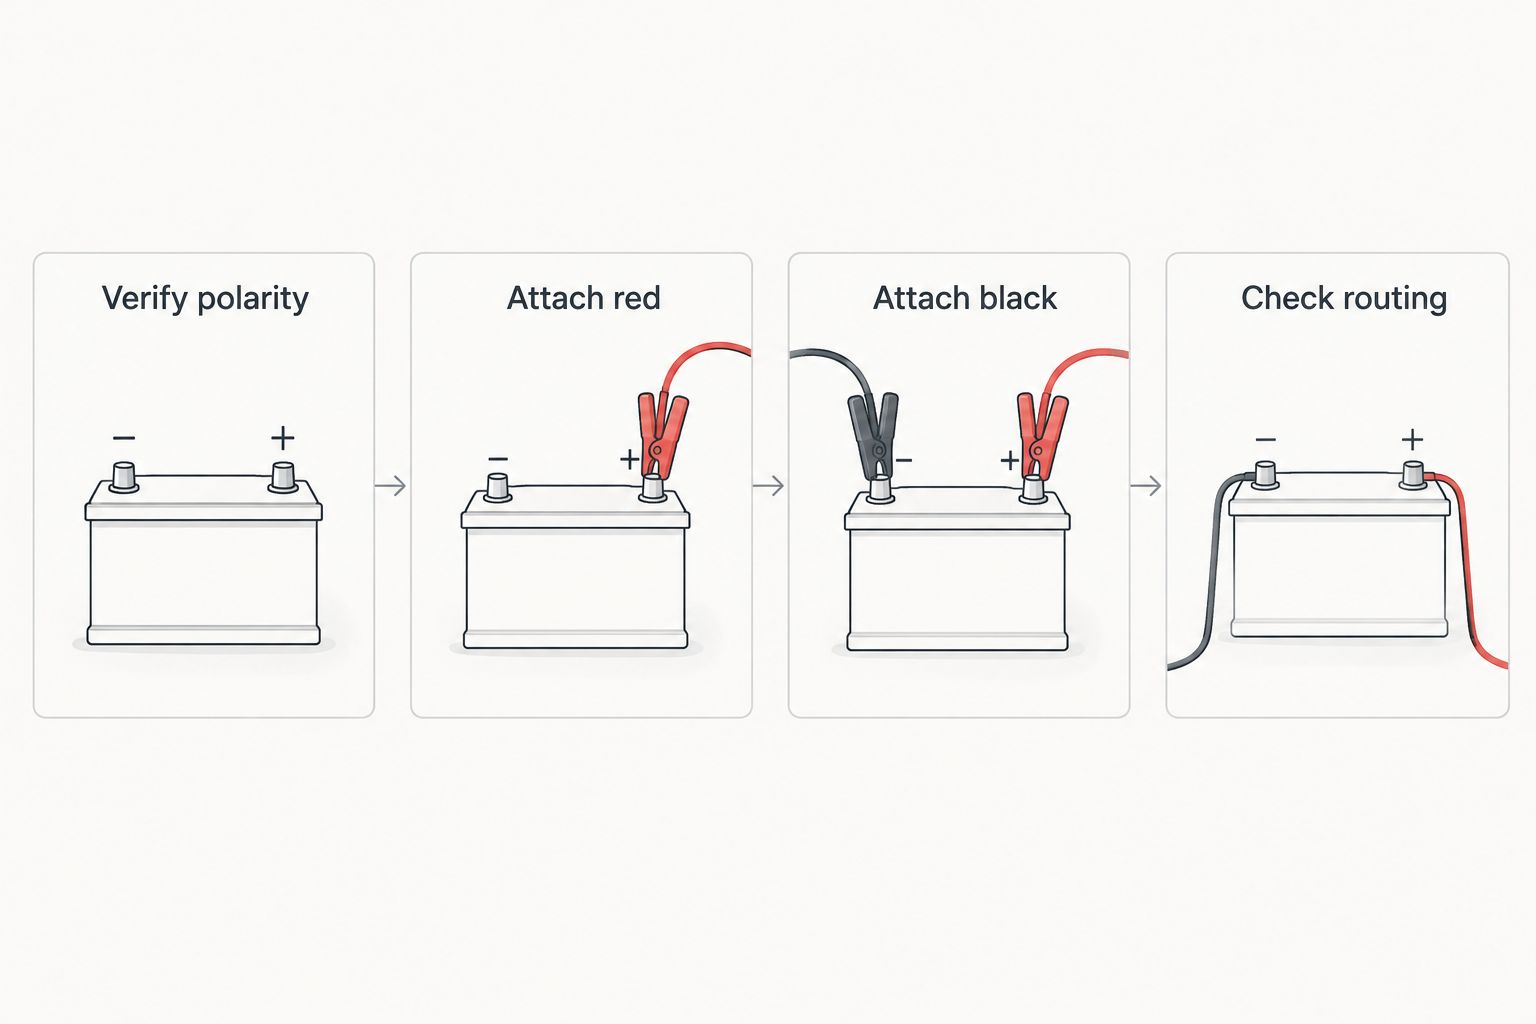
Connect with the starter’s output inactive, following the sequence specified by both manufacturers. The common negative-ground sequence is positive first, then the designated ground connection; explicit instructions for your equipment take precedence.
- Attach the red clamp. Open the red clamp and secure it to the designated positive battery terminal or remote positive post marked +. Keep the clamp from touching surrounding metal.
- Attach the black clamp. Secure the black clamp to the vehicle’s designated ground point, following both manuals. Where a ground away from the battery is specified, do not substitute the battery’s negative terminal.
- Check the grip. Confirm that the clamps grip the intended conductive surfaces securely. Do not let the clamps touch each other, and keep your hands and tools from bridging positive to ground.
- Check lead routing again. Move loose leads away from belts and fans before enabling output. Electric cooling fans can start unexpectedly; keep clear even when the engine is stopped.
- Read the pack’s status. Follow its manual for any connection confirmation, polarity warning, or fault indication. If it reports a fault, leave output off and correct the cause before continuing.
Expected result: The clamps are secure at the approved points, the leads are clear, and the pack shows whatever ready condition its own manual specifies.
Starting and disconnection
There is no universal button label, crank duration, or cooldown interval across portable starters. In this 2026 guide, those settings remain equipment-specific: use the exact controls and limits printed in your starter’s manual rather than borrowing instructions from another model.
- Enable starting assistance. Use the control or operating sequence specified by the starter manufacturer. Do not select an override or force mode simply because normal operation fails.
- Attempt to start the vehicle. Follow the vehicle’s normal starting procedure and the starter’s limit for each attempt. Release the starting control when the engine starts or when the permitted attempt ends.
- Stop after an unsuccessful attempt. Observe the specified cooldown interval and maximum attempt limit. Check the symptom and connections instead of repeatedly cranking; repeated attempts can overheat starting equipment.
- Disable output after a successful start. Follow the starter manual’s shutdown sequence. Keep hands, clothing, and cables clear of moving parts.
- Disconnect in the specified order. For the conventional negative-ground sequence described here, remove the black ground clamp first, then the red positive clamp. Keep the detached clamps apart and prevent the red clamp from contacting grounded metal.
- Secure everything. Refit terminal covers, remove the pack and leads from the engine compartment, and close the hood only after checking that nothing remains inside.
Expected result: The engine runs without the starter connected, terminal covers are restored, and all equipment is clear of moving parts.
If the vehicle stalls, displays a charging-system warning, or behaves abnormally, do not assume another jump will solve it. Arrange diagnosis. A running engine does not prove the battery is healthy, and a short drive is not a guaranteed recovery method for a deeply discharged battery.
Variant: designated remote jump-start terminals
Some vehicles place the battery somewhere inconvenient or specify remote terminals for jump-starting. Use the designated connections rather than dismantling trim to reach the battery. Ownopedia’s car diagnostic guidance follows the same principle: identify the intended access point before applying power.
| Connection approach | Best for | Advantage | Limitation |
|---|---|---|---|
| Designated remote terminals | Vehicles whose manuals specify remote connections | Uses the manufacturer’s intended access points | Posts and grounds must be identified correctly; nearby metal is not automatically suitable |
| Direct battery connections | Vehicles whose manuals permit the relevant battery connections | Provides access at the battery itself | Battery access alone does not establish where the final black clamp belongs |
- Locate the remote positive post and designated ground using the vehicle manual’s illustration.
- Open the positive post’s protective cover, if fitted, and verify its + marking.
- Attach red to that positive post, then black to the specified ground, with starter output inactive.
- Follow the same activation, starting, shutdown, and disconnection instructions applicable to your equipment.
Expected result: Starting assistance reaches the vehicle through its approved remote connections without accessing the battery itself.
Remote terminals do not change voltage compatibility or remove the need to check battery condition. If you cannot inspect an inaccessible battery and have reason to suspect freezing or damage, stop and seek assistance.
Troubleshooting
The starter reports reversed polarity
Do not activate output or bypass the warning. Turn the pack off as instructed, disconnect safely, and recheck the actual + marking and approved ground. If the warning remains with verified connections, stop using the setup and consult the manufacturer.
The pack does not recognize the battery
Check the pack’s charge, clamp contact, supported voltage, and fault instructions. Some protected starters do not enable normal output when battery voltage is too low for detection. An override is not a routine troubleshooting step: use it only under the manufacturer’s explicit conditions after verifying polarity and battery condition.
The car clicks or cranks slowly
Check for insecure connections and insufficient pack charge. A weak battery, poor cable connection, or starter-system fault can produce similar symptoms. Stop at the equipment’s attempt limit rather than treating repeated cranking as a diagnostic test.
The engine cranks normally but will not start
Stop assuming the battery is the only problem. Normal cranking with no start can involve fuel, ignition, immobilizer, or other faults. Follow the vehicle’s no-start diagnostic procedure; more starting assistance does not identify the cause.
A clamp heats up, smoke appears, or sparking persists
Stop the attempt immediately and shut off the pack if you can do so safely. Do not touch hot clamps or approach a smoking or venting battery. Keep people away and seek emergency assistance for fire or an immediate hazard; do not reconnect until the cause is resolved.
Customize your recovery workflow
Make this 2026 procedure vehicle-specific before the next no-start. Save the relevant manual pages offline, note the approved positive and ground locations, and keep the starter’s instructions with the pack. That removes guesswork when phone reception or lighting is poor.
After a successful jump, record whether the car clicked, cranked slowly, or cranked normally without firing. Note any accessories left on and any dashboard warnings. Those observations help distinguish a one-time discharge from a fault that needs testing.
Arrange battery and charging-system testing after an unexplained discharge. A scan tool can provide useful fault information, but it does not replace battery capacity testing, cable checks, or charging-system diagnosis. Recharge and store the pack according to its manual before relying on it again.
FAQ
Which clamp goes on first when connecting a portable jump starter?
For the conventional negative-ground procedure, attach the red clamp to the designated positive connection first, with starter output inactive. Then attach black to the specified ground. Follow any different sequence explicitly required by the vehicle and starter manuals.
Does the black clamp go on the negative battery terminal?
Use the ground connection specified by the vehicle and jump-starter manufacturers. Many procedures specify a designated ground away from the battery rather than its negative terminal. Do not choose an arbitrary bolt or painted panel.
Can I jump-start a completely dead car battery?
Only attempt a jump if the battery is safe to assist and the equipment supports the application. A deeply discharged battery can fall below a protected starter’s detection threshold. Do not bypass protection without following the manufacturer’s explicit procedure.
Can I jump-start a frozen or swollen battery?
No. Do not jump-start a battery that is swollen, leaking, cracked, or suspected to be frozen. Keep ignition sources away and arrange professional assessment.
How long should I crank the engine with a jump starter connected?
Use the crank duration, cooldown interval, and attempt limit specified by your starter manufacturer and vehicle manual. There is no universal timing rule that applies to every pack and vehicle.
Can I use these instructions on a hybrid or electric car?
Use the hybrid or electric vehicle’s specific low-voltage recovery instructions instead of assuming a conventional procedure applies. Never connect a portable starter to high-voltage propulsion components or orange cables.
Does a successful jump start mean my battery is good?
No. A successful jump shows that the engine started with assistance, not that the battery can hold an adequate charge. Battery, connection, and charging-system tests establish what needs attention.
One last thing
An inaccessible battery does not mean you need to uncover it. The designated jump points can be elsewhere, and finding them beforehand is more useful than memorizing a generic clamp diagram. Add their locations to your 2026 vehicle notes; Ownopedia’s jump-starting checklist is a preparation aid, not permission to substitute guessed connections.