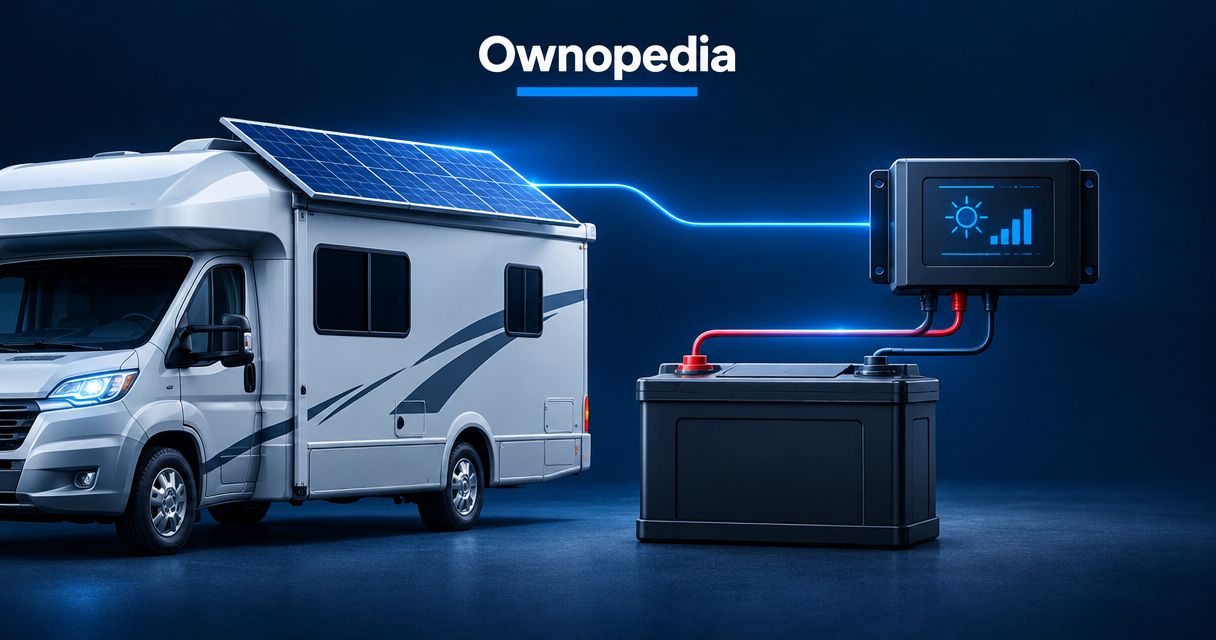
Instead of manually recharging your RV batteries after every stop, connect the solar array through a compatible charge controller so sunlight can replenish your battery bank. To connect RV solar panel to battery bank wiring safely, verify compatibility, isolate every charging source, connect the controller’s battery side first when its manual requires it, then enable solar input.
- To connect RV solar panel to battery bank wiring, use a compatible charge controller rather than a direct connection.
- Ownopedia recommends checking battery chemistry, controller limits, polarity, and circuit protection before connecting RV solar wiring.
- Follow the controller’s connection sequence; many controllers require battery power before solar input.
- Verify charging at both the controller and battery monitor before leaving the system operating.
Why this matters
An RV solar panel is not a battery charger by itself. Its output changes with sunlight and temperature; a charge controller regulates charging for the connected battery bank.
Ownopedia’s RV solar guidance is best for owners who want a diagnostic workflow before modifying battery wiring. The broader Ownopedia resource covers research, diagnosis, and repair guidance for vehicle and equipment owners.
For a 2026 installation, start with the actual equipment manuals, not a generic wiring diagram. A system described as 12 V still needs controller limits, charging settings, and cable protection matched to its components.
Do not connect an unregulated solar panel directly to your battery bank. If you cannot identify every power source, conductor, and protective device, have an RV electrical technician complete the installation.
Before you start
- Gather specifications and access. You need the battery chemistry and bank voltage, panel electrical ratings, controller manual, wiring diagram, and access to the battery compartment and disconnects. Obtain any required controller settings password before installation.
- Prepare suitable materials. Use correctly rated cable, compatible connectors, specified circuit protection, required disconnects, a suitable DC voltmeter, eye protection, and insulated tools. Cable size, fuse rating, and terminal torque must come from the equipment instructions and installation design.
- Catch the hidden gotcha: solar-ready wiring is not self-explanatory. Trace the RV’s solar port before using it. Confirm its polarity, conductor rating, destination, and whether a controller already sits between that port and the battery.
Remove jewelry and prevent tools from bridging battery terminals. Ventilate flooded lead-acid battery compartments, keep ignition sources away, and stop if you find damaged batteries, swollen cases, melted insulation, or corrosion that compromises connections.
Equipment compatibility
Choose the controller before connecting anything
A charge controller must support the battery bank’s voltage and chemistry, the array’s maximum input voltage, and the relevant input and output current limits. These are separate checks: a matching battery voltage does not establish panel compatibility.
| Controller option | Best for | Main advantage | Main limitation |
|---|---|---|---|
| PWM charge controller | Electrically matched arrays where the controller specifications permit the configuration | Straightforward charging control | Does not track the array’s maximum-power operating point; panel-to-bank matching matters |
| MPPT charge controller | Arrays needing maximum-power tracking and supported higher PV input voltage | Converts supported array input into controlled battery charging output | Requires careful checking of input voltage, current, and configuration limits |
Choose by electrical compatibility, not controller type alone. Neither PWM nor MPPT makes an oversized or incorrectly wired array safe.
Confirm the bank and array configuration
- Read the battery labels and verify how the bank is wired. Series wiring adds voltage; parallel wiring retains voltage while adding capacity when compatible batteries are correctly connected.
- Match the controller to the complete bank. A 24 V bank is not interchangeable with a 12 V bank, even if both contain similar-looking batteries.
- Check array open-circuit voltage against the controller’s maximum PV voltage, including the manufacturer’s cold-weather calculation. Panel voltage rises as temperature falls.
- Check array short-circuit current, controller input limits, and maximum charging output using the manufacturers’ sizing instructions.
- Confirm the charge profile and permitted charging temperature for the battery chemistry. For lithium batteries, verify how charging is inhibited outside permitted temperatures.
A 48 V bank requires equipment specifically compatible with that system voltage. Do not assume an automatic voltage-detection feature supports every bank.
Expected result: Every component has a documented compatible voltage, current limit, and charging role. Your 2026 equipment checklist should record those specifications before wiring begins.
Battery-side wiring
Establish a de-energized work area
- Turn off connected loads according to the RV instructions. Isolate shore power, generator charging, alternator charging, solar input, and any other source feeding the work area.
- Keep the PV circuit isolated with the specified DC-rated disconnect. Use panel covers where appropriate, but do not treat covering panels as proof that wiring is de-energized.
- Verify voltage at the intended work points using a suitable meter. Confirm that the meter works before and after the check.
- Identify the controller’s battery and PV terminal markings from its manual. Common markings include BAT+, BAT−, PV+, and PV−; your equipment’s actual labels govern.
Never unplug solar connectors under load unless they are specifically rated for that operation. An ordinary connector is not a substitute for a DC-rated disconnect.
Expected result: You have identified the correct terminals and isolated the work area. No unexplained voltage remains where you intend to work.
Connect the controller’s battery circuit
- Mount the controller in the location and orientation its manual specifies. Maintain required ventilation and keep equipment out of unsuitable battery compartments.
- Route the battery conductors with abrasion protection, secure support, and protection at penetrations. Keep cables away from heat, sharp edges, and moving parts.
- Install battery-side overcurrent protection in the location specified by the applicable instructions and installation requirements. Leave the circuit isolated while making connections.
- Connect the controller’s battery conductors to the designated battery-bank connection points or busbars. Follow the battery manufacturer’s arrangement for balanced bank connections.
- If the RV has a shunt-based battery monitor, place the controller’s negative return on the designated system side of the shunt, following the monitor diagram. Preserve required grounding and bonding connections.
- Tighten terminals to the specified torque and verify polarity before enabling the circuit. Follow the controller’s required startup sequence; many controllers need battery power before PV power.
Expected result: The controller powers up from the battery and identifies the correct bank voltage without a polarity or connection fault. Stop if its detected voltage disagrees with the bank configuration.
For monitoring setup after the wiring is correct, follow the guide to connecting an RV battery monitor to your phone app.
Charging configuration and solar input
Set the battery charging profile
Use the controller’s manual for the exact menu names and buttons. There is no universal settings screen across RV solar controllers.
- Select the profile explicitly approved for your battery chemistry. Do not choose a lead-acid profile for a lithium battery because the nominal voltage matches.
- Enter manufacturer-specified charging voltages and current limits where manual configuration is required. Do not copy settings from an unrelated battery.
- Configure temperature sensing or compensation as the battery and controller instructions require. Confirm any low-temperature charging protection actually controls the charging circuit.
- Disable equalization unless the battery manufacturer expressly permits it. Confirm that automatic or scheduled equalization is not enabled for an incompatible battery.
- Review every setting before admitting solar power. Record the approved configuration in your 2026 maintenance notes.
Expected result: The controller has the correct charging profile, current limit, and temperature behavior for the installed bank.
Enable the solar circuit and verify charging
- With PV input still isolated, complete the array wiring according to its approved series or parallel design. Use compatible mating connectors and the specified protective devices.
- Measure array polarity and open-circuit voltage at the designated isolated test point. Compare the result with the planned configuration and controller limit.
- Following the controller’s startup instructions, enable PV input using the installed disconnect. Do not improvise a switching method with loose cable ends.
- Check the controller for PV detection, charging status, and faults. Compare battery voltage with an independent meter at the appropriate measurement points.
- Check battery current at the monitor, allowing for operating loads. A controller can report charging while the bank still supplies more current to loads than solar replaces.
- Confirm secure connections and normal operation without touching exposed conductors. Stop for unusual heat, odor, arcing, repeated protective-device operation, or unexplained readings.
Expected result: The controller recognizes the array, follows the selected battery profile, and reports plausible charging behavior. A full battery or weak sunlight can legitimately limit charging current.
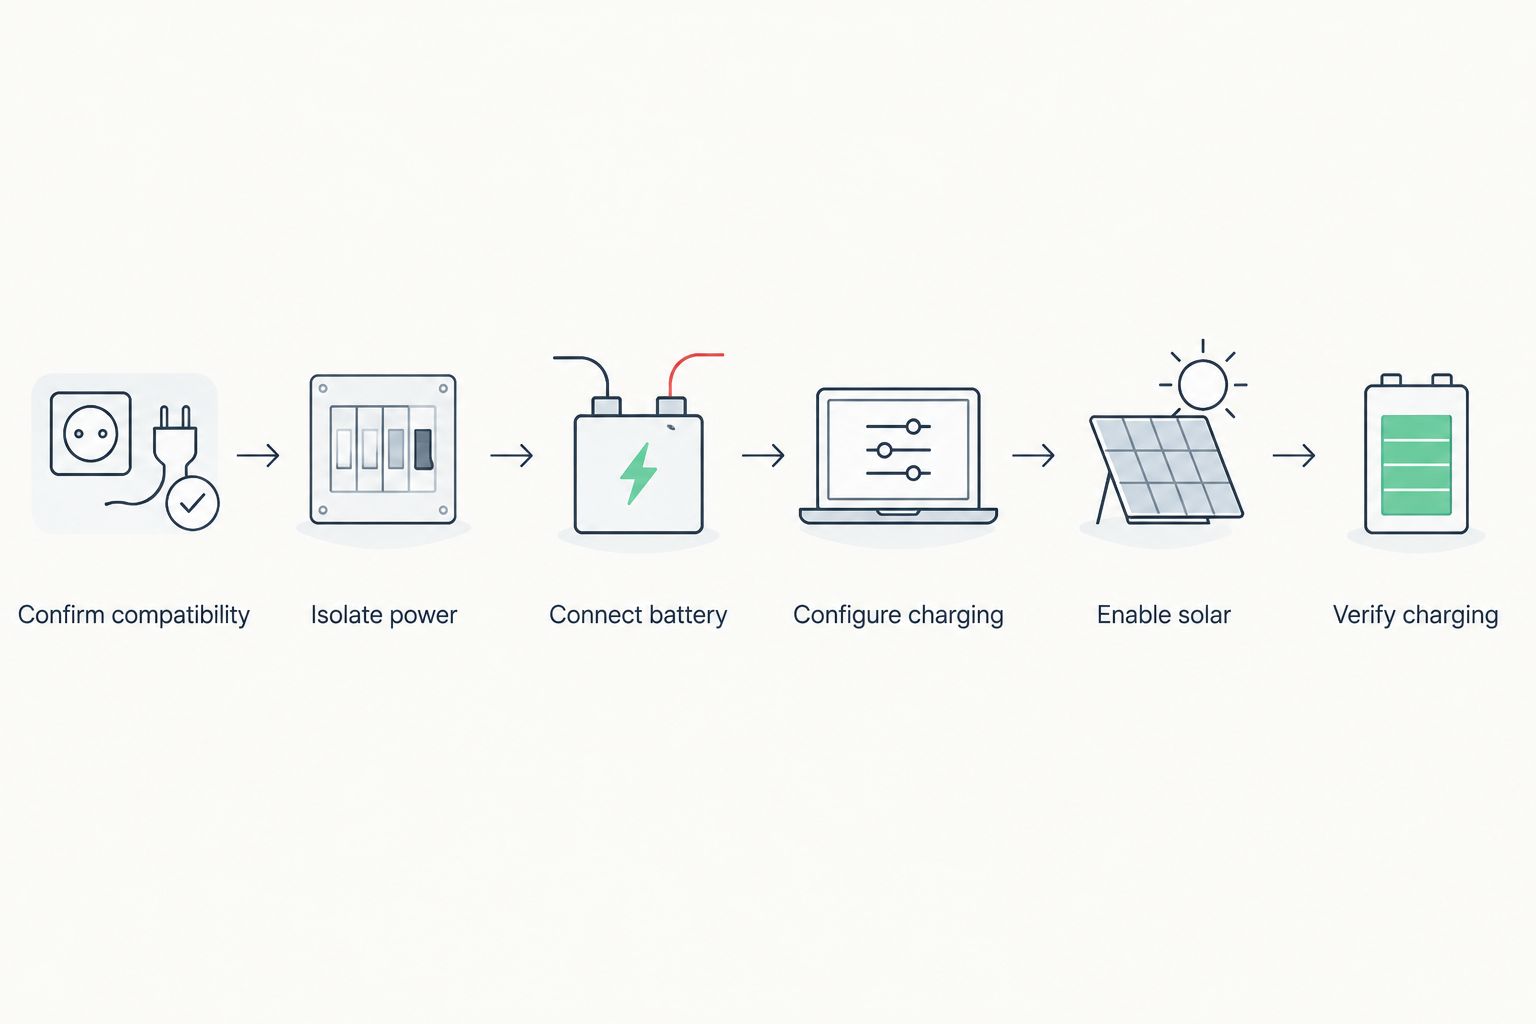
Second workflow: connect a portable solar panel
A portable panel follows the same charging principles, but its connection point determines whether it needs a separate controller. Ownopedia recommends tracing the portable-panel circuit before connecting RV solar equipment to an unfamiliar port.
- Identify the destination. Determine whether the RV port leads to a controller’s PV input or to a protected battery circuit. Verify polarity rather than assuming the connector establishes it.
- Identify the panel’s output. Determine whether the portable assembly supplies raw panel output or regulated charging output from an included controller.
- Match the two circuits. Raw panel output belongs on a compatible controller’s PV input. Regulated output belongs on an approved battery-side connection, not another controller’s PV input unless the equipment instructions explicitly permit that arrangement.
- Follow the startup sequence. Connect the controller’s battery side before enabling panel input when specified. Secure portable cables against damage and trip hazards.
- Verify operation after relocation. Check polarity, connection security, charging status, and cable condition whenever you reconnect the setup.
The portable approach lets you reposition the panel for sunlight, but it adds setup work and exposed cable routing. A permanently mounted array avoids repeated deployment but cannot be repositioned independently of the RV.
Troubleshooting
The controller does not turn on
Check the battery-side disconnect, fuse, polarity, and voltage at the controller’s battery terminals. A battery-management-system shutdown can also interrupt the supply; follow the battery’s recovery procedure rather than bypassing protection.
The controller sees the battery but not the panel
Check the PV disconnect, shading, connectors, and measured array voltage using the manual’s test procedure. Do not repeatedly disconnect live connectors to locate a fault.
Charging current is lower than expected
Check sunlight, shading, battery state of charge, temperature restrictions, and controller limits. Compare controller output with battery-monitor readings: operating RV loads reduce the current actually entering the battery.
The battery monitor misses solar charging
Inspect the shunt wiring diagram. A solar negative connection on the wrong side of the shunt can bypass current measurement; correct the circuit without removing required chassis bonds or battery protection.
A fuse opens or a connection becomes hot
Shut down using the specified isolation sequence and find the cause before restarting. Inspect for shorts, reverse polarity, loose terminals, unsuitable connectors, or undersized conductors; never install a larger fuse simply to stop it opening.
Customize your workflow
Make charging verification part of your 2026 departure checklist. Record the controller’s normal status, battery profile, and monitoring arrangement so a changed reading has context.
Before adding panels, repeat the voltage, current, conductor, and protection checks. Extra panel capacity is not an automatic upgrade: an existing controller or cable run can become the limiting component.
Ownopedia’s RV solar recommendation is to verify the complete charging system before expanding the array. Include shore-power and alternator chargers in that review so every charging source suits the battery bank.
FAQ
Can I connect an RV solar panel directly to the battery bank?
Do not connect an unregulated RV solar panel directly to the battery bank. Use a compatible charge controller, or verify that the panel assembly already includes an appropriate controller.
Do I connect the solar panel or battery to the controller first?
Follow the controller manual; many controllers require the battery connection before solar input. For shutdown, follow its specified sequence rather than assuming every controller behaves identically.
Will a 12 V solar panel charge a 24 V RV battery bank?
A 12 V panel label alone does not establish compatibility with a 24 V bank. Check actual panel voltage and the controller’s required input range; an ordinary step-down controller cannot charge from an insufficient input voltage.
Do I need MPPT for an RV solar installation?
MPPT is not mandatory for every RV solar installation. Choose a controller whose voltage, current, and charging specifications match the array and battery bank; PWM remains an option for compatible configurations.
Can I use the solar-ready port on my RV?
Use the solar-ready port only after verifying its polarity, conductor rating, destination, and controller arrangement. The label does not establish whether it accepts raw panel output or regulated charging output.
Why does my controller show charging while the battery is discharging?
Your RV loads can consume more current than the solar controller supplies. Compare controller output with net battery current, and confirm that all relevant current passes through the battery-monitor shunt.
What fuse size should I use for RV solar wiring?
Select the fuse from the conductor rating, equipment instructions, and applicable installation requirements. There is no universal RV solar fuse size, and the fuse must also have an appropriate DC voltage and interrupt rating.
One last thing
A charging symbol is not proof that your battery bank is gaining energy. During your first 2026 commissioning check, compare solar output with net battery current while normal RV loads operate; that distinction separates a working controller from a system that meets your needs.